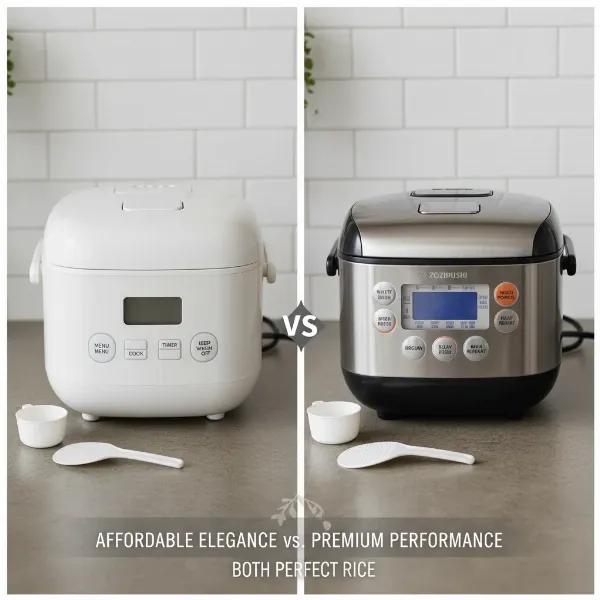
Your Zojirushi rice cooker is a culinary workhorse, renowned for its consistent performance and durability. You rely on it for perfectly cooked rice every time, and its convenient timer functions often simplify meal prep. But what happens when your trusty appliance starts forgetting the time or your carefully programmed settings every time you unplug it? This common frustration points to a failing internal battery, a small but crucial component that maintains your cooker’s memory.
Don’t rush to replace your entire rice cooker just yet! Often, a simple battery swap can bring your Zojirushi back to its former glory, saving you money and preventing unnecessary waste. This guide will walk you through everything you need to know, from understanding the battery’s role and identifying symptoms of failure to a detailed, step-by-step replacement process. We’ll cover the necessary tools, crucial safety precautions, and even discuss alternative “no-solder” solutions for the less technically inclined. Get ready to restore your Zojirushi’s memory and enjoy perfectly timed meals once more.
Understanding Your Zojirushi’s Internal Battery
The internal battery in your Zojirushi rice cooker plays a vital, albeit behind-the-scenes, role. Its primary function is to power the real-time clock and maintain crucial settings like cooking timers, language preferences, and programming schedules when the rice cooker is unplugged or experiences a power outage. Without this small battery, your Zojirushi essentially gets “amnesia” every time it loses main power.
Common symptoms of a failing internal battery include:
- Loss of Time and Timer Settings: This is the most prevalent sign. If your rice cooker’s clock resets to a default (often 12:00 or a blinking “7:00”) or loses all programmed settings whenever it’s unplugged, the battery is likely dead or critically low.
- Blinking Display: Some models might display a persistent blinking “7:00” or another error code related to timekeeping, even when plugged in, indicating the battery can no longer hold a charge.
- Unresponsive Control Panel (with clock still visible): In some cases, a weak battery can cause the microcontroller to freeze, rendering buttons unresponsive while the clock itself might still be displayed. A full battery replacement often resolves this.
These batteries are typically lithium coin cells, designed to last for several years, usually between five and ten. However, like all batteries, they have a finite lifespan and will eventually need replacement. The good news is that replacing this battery often breathes new life into an otherwise perfectly functional appliance.
Essential Tools and Safety Precautions
Before you begin any repair work on your Zojirushi rice cooker, it’s essential to gather the right tools and prioritize safety. Working with electronics, even unplugged, requires careful attention to detail and appropriate precautions.
Tools You’ll Need
The specific tools can vary slightly depending on your Zojirushi model and whether the battery is soldered or held by a simple clip.
- Screwdrivers: You’ll likely need a set of Phillips-head screwdrivers. Some Zojirushi models may use a security Torx screw (e.g., Torx T9 or T24) for the bottom panel, which requires a specialized bit. A small flat-head screwdriver can also be useful for prying.
- Soldering Iron and Supplies: If your existing battery is soldered (which is very common), you’ll need a soldering iron, desoldering braid or a desoldering pump to remove the old solder, and fresh electronic solder.
- Pliers and Tweezers: Needle-nose pliers are handy for manipulating small wires and components. Fine-tip tweezers can help with delicate handling of the battery and circuit board.
- New Internal Battery: This is critical. Common types are CR2032 (found in many modern Zojirushi models), CR2450, or CR2354 (as seen in some NS-ZCC10 and NH-VBC18 models). Always check your existing battery or the owner’s manual for your specific model to ensure you get the correct voltage and size.
- Battery Holder (Optional): For a future “no-solder” replacement, consider purchasing a compatible coin cell battery holder that can be soldered onto the PCB. This makes subsequent battery changes much simpler.
- Multimeter (Optional): A multimeter can be useful for checking the voltage of the old and new batteries, helping to confirm the diagnosis.
- Soft Work Surface: Protect your rice cooker and your workspace by placing a soft towel or mat on your table.
|
Our Picks for the Best Rice Cooker in 2026
As an Amazon Associate I earn from qualifying purchases.
|
||
| Num | Product | Action |
|---|---|---|
| 1 | AROMA Digital Rice Cooker, 4-Cup (Uncooked) / 8-Cup (Cooked), Steamer, Grain Cooker, Multicooker, 2 Qt, Stainless Steel Exterior, ARC-914SBD |

|
| 2 | AROMA® Mini Rice Cooker, 2-Cup (Uncooked) / 4-Cup (Cooked), Grain Cooker, Soup Maker, Oatmeal Cooker, Auto Keep Warm, 1 Qt, Milk Tea color |
|
| 3 | BLACK+DECKER Rice Cooker 6-Cup (Cooked) with Steaming Basket, Removable Non-Stick Bowl, White |
|
| 4 | COMFEE' Compact Rice Cooker, 6-in-1 Stainless Steel Multi Cooker, Slow Cooker, Steamer, Saute, and Warmer, 2 QT, 8 Cups Cooked(4 Cups Uncooked), Brown Rice, Quinoa and Oatmeal, 6 One-Touch Programs |
|
| 5 | AROMA® Select Stainless® Rice Cooker, 3-Cup (Uncooked) / 6-Cup (Cooked), Stainless Steel Inner Pot, Small Rice Cooker, Auto Keep Warm, 1.2 Qt, White, ARC-753SG |
|
| 6 | Instant Pot 4QT RIO Mini 7-in-1 Multi-Cooker, Pressure Cooker, Slow cook, Sauté, Steam, Rice Maker, Yogurt, & Warmer, Sea Salt, 4 Quarts |
|
| 7 | Aroma Housewares 4-Cups (Cooked) / 1Qt. Rice & Grain Cooker (ARC-302NGBL), Blue |
|
| 8 | COSORI Rice Cooker 10 Cup, 24h Keep Warm, Non-stick Ceramic Inner Pot, 18 Functions Fuzzy Logic Rice Maker with Stainless Steel Steamer Basket, Sauté, Slow Cooker, Black |
|
| 9 | AROMA® Mini Rice Cooker, 2-Cup (Uncooked) / 4-Cup (Cooked), Grain Cooker, Soup Maker, Oatmeal Cooker, Auto Keep Warm, 1 Qt, Light Green |
|
| 10 | Zojirushi Micom 3-Cup Compact Size, Multiple Settings, Stainless Steel Made, Built-In Retractable Power Cord and Easy to Transport Rice Cooker and Warmer |
|
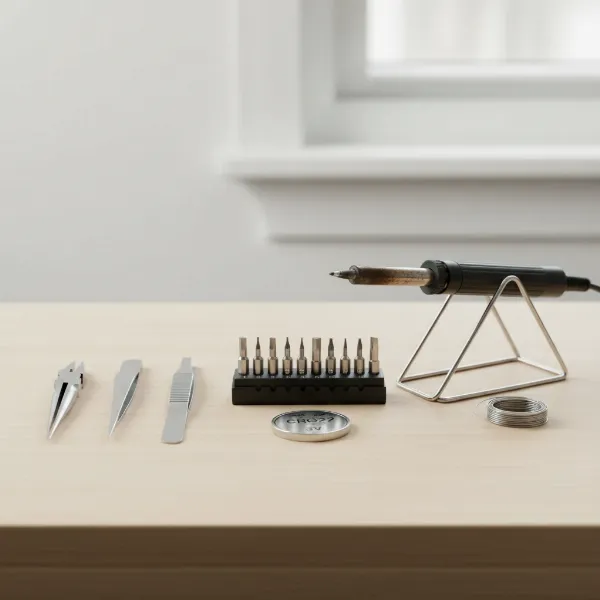 A collection of small screwdrivers, a soldering iron, pliers, tweezers, and a coin cell battery on a clean workbench.
Safety First
Your safety is paramount. Please adhere to these guidelines:
- Unplug First: Always, without exception, unplug your Zojirushi rice cooker from the wall outlet before attempting any disassembly or repair.
- Mind the Capacitors: Electronic devices can contain capacitors that store an electrical charge even after being unplugged. While typically not high-voltage in a rice cooker, it’s always best to avoid touching exposed circuit board components unnecessarily.
- Warranty Void: Opening your Zojirushi rice cooker will likely void any remaining manufacturer’s warranty. Proceed at your own risk.
- Handle with Care: Internal components, especially circuit boards and delicate wires, can be fragile. Use gentle force and be mindful of where you’re prying or pulling.
- Soldering Safety: If soldering, ensure you work in a well-ventilated area, wear appropriate eye protection, and avoid touching the hot tip of the soldering iron.
Diagnosing a Dead Battery
Before you start disassembling your rice cooker, it’s helpful to confirm that the internal battery is indeed the culprit. While other issues can arise, a failing memory battery presents distinct symptoms.
The clearest indicator is when your rice cooker loses its time and any programmed settings whenever it is unplugged. This often manifests as the display resetting to a default time (e.g., 12:00) or blinking “7:00” upon being plugged back in. If you have to reset the clock or your cooking timers daily, even after short power interruptions, your internal battery is almost certainly exhausted.
Another symptom can be an unresponsive control panel where the clock might still be displayed, but no buttons function. This happens because the battery provides just enough power for minimal clock functions but not enough to support the full operations of the processor.
It’s important to distinguish these symptoms from other potential problems. If your rice cooker has no display at all when plugged in, has trouble heating, or exhibits other cooking performance issues (like burning rice or uneven cooking), the problem is likely more severe than just a dead internal battery and might require professional repair. The internal battery primarily affects memory retention, not the core cooking functionality of the appliance itself.
Step-by-Step Internal Battery Replacement
Replacing the internal battery in your Zojirushi rice cooker is a manageable DIY project for those with basic tool-handling skills. Remember to work carefully and systematically.
Disassembly
- Unplug Your Rice Cooker: As reiterated, safety first. Ensure the unit is completely disconnected from power.
- Prepare Your Workspace: Lay down a soft towel or mat on a clean, well-lit surface to prevent scratches and keep small screws organized.
- Remove the Bottom Panel: Turn the rice cooker upside down. You will find several screws on the bottom panel. Use the appropriate screwdriver (Phillips or Torx) to remove them. Keep track of which screws came from where, as they might differ in size or type. Some models, like the Zojirushi NS-ZCC10, might have one security Torx screw that requires a special bit.
- Carefully Separate the Base: Gently lift the base of the rice cooker. Be extremely cautious, as there will be wires connecting the base to the main unit. Do not pull or yank, as you could damage these connections. You may need to carefully disconnect a few wire harnesses to fully separate the base, taking pictures beforehand to remember their placement.
- Locate the PCB and Battery: Inside the base, you’ll find the main Printed Circuit Board (PCB). Look for a small, silver, coin-shaped battery. It’s often labeled “CR2032,” “CR2450,” or “CR2354.” The battery is usually mounted vertically or flush against the board, sometimes under insulation foam.
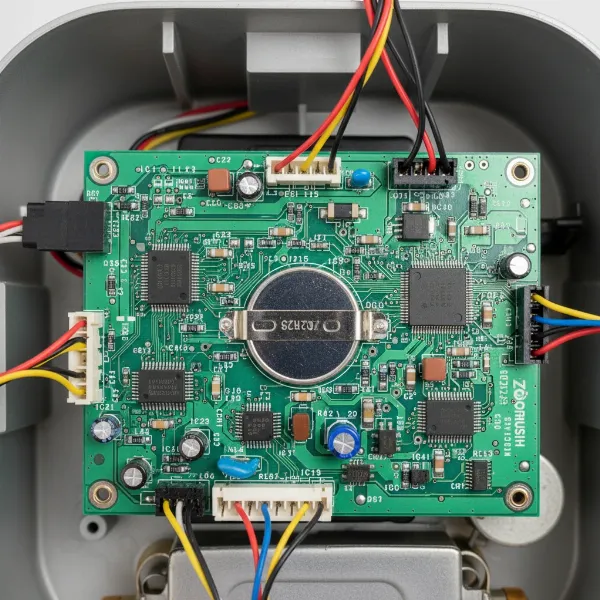 A close-up view of a Zojirushi rice cooker's internal circuit board with the coin cell battery clearly visible.
Battery Removal (Soldered Type)
Most Zojirushi models utilize a battery that is spot-welded or soldered directly to the PCB for a secure connection.
- Note Polarity: Before removing the old battery, carefully observe its orientation. Note which side is positive (+) and which is negative (-). The positive side is usually facing up and is often marked on the battery itself or on the PCB. This is crucial for correct installation of the new battery.
- Desolder the Old Battery: Heat your soldering iron. Using desoldering braid or a desoldering pump, carefully remove the solder from the two tabs or connection points holding the battery in place. Work quickly to avoid overheating the PCB.
- Gently Pry Out the Battery: Once the solder is removed, use tweezers or a small flat-head screwdriver to gently pry the old battery free from its contacts. Be careful not to bend the contact arms or damage the PCB.
- Clean Contact Pads: Use a clean cloth or cotton swab with a tiny amount of isopropyl alcohol to clean any residue from the contact pads on the PCB.
Battery Removal (Clip/Holder Type – Less Common)
Some newer or specific models might have a battery held by a simple clip, making replacement easier.
- Gently Pry: If your battery is in a holder, use a non-conductive tool (like a plastic spudger or a small flat-head screwdriver) to gently pry the old battery out of its clip.
Installing the New Battery
You have two main options for installing the new battery: soldering it directly or using a battery holder for future convenience.
Option 1: Solder New Battery Directly
- Match Polarity: Position the new battery on the PCB, ensuring the positive (+) and negative (-) terminals match the original orientation. For a CR2032, the positive side usually faces up.
- Solder the New Battery: Carefully solder the battery tabs to the designated pads on the PCB. Apply enough solder to create a strong connection, but avoid excessive heat or solder bridges between contacts.
Option 2: Install a Battery Holder for Future Ease
This method is highly recommended if you have soldering skills, as it simplifies future battery replacements.
- Solder Battery Holder: Purchase a compatible coin cell battery holder with tabs that align with the existing battery’s solder points on the PCB. Solder the battery holder securely onto the PCB.
- Insert New Battery: Once the holder is securely soldered, simply insert your new coin cell battery into the holder, ensuring correct polarity.
Reassembly and Testing
- Reconnect Wires: Reconnect any wire harnesses you previously disconnected. Double-check that all connections are secure and correctly oriented.
- Reassemble the Base: Carefully align the bottom panel with the main unit. Ensure no wires are pinched or obstruct the casing.
- Secure Screws: Replace all the screws you removed earlier, tightening them just enough to be snug, but avoid overtightening.
- Initial Test: Plug your Zojirushi rice cooker back into the power outlet.
- Set Time and Test: Set the current time and any desired timer functions.
- Final Verification: Unplug the rice cooker for a few minutes, then plug it back in. If the time and settings are retained, your internal battery replacement was successful!
Model-Specific Battery Considerations
It’s crucial to understand that while the general process is similar, the exact battery type and even the internal layout can vary between different Zojirushi rice cooker models. For instance, many modern models commonly use a CR2032 lithium coin cell. However, older or specific “Neuro Fuzzy” models, such as the NS LAC05, NS-ZCC10, or NH-VBC18, have been noted to use CR2450 or CR2354 batteries.
Always check your specific model’s existing battery for its type (e.g., CR2032, CR2450, CR2354) before purchasing a replacement. If you can’t access the battery first, consult your Zojirushi owner’s manual or search online forums specific to your model for confirmation. Using the wrong battery type or voltage could potentially damage your appliance.
Beyond Battery Replacement: When to Seek Professional Help
While replacing the internal battery can resolve many common issues, there are instances when it’s best to seek professional assistance. If you’re uncomfortable with the idea of disassembling your rice cooker or performing delicate soldering, a qualified electronics repair technician is your best resource. Attempting repairs beyond your skill level could lead to further damage to your appliance or even personal injury.
Additionally, if the issues with your Zojirushi extend beyond clock and timer retention—for example, if the rice cooker isn’t heating, the display is completely blank even when plugged in, or it’s tripping electrical breakers—the problem is likely more complex than a simple battery issue. These symptoms suggest deeper electrical or component failures that require specialized diagnostics and repair. In such cases, a professional repair service is highly recommended to ensure your Zojirushi is fixed safely and correctly.
Conclusion
Bringing your Zojirushi rice cooker back to full functionality by replacing its internal battery is a rewarding project for any home cook. It’s a testament to the durable engineering of these appliances that a small, replaceable component can extend their useful life by many years. By carefully following the steps outlined, preparing with the right tools, and prioritizing safety, you can restore your rice cooker’s memory and ensure it continues to serve you perfectly timed, delicious meals.
Has your Zojirushi ever lost its clock settings? What was your experience with replacing the internal battery? We’d love to hear your tips and stories!
Frequently Asked Questions
What kind of battery does a Zojirushi rice cooker use?
Most modern Zojirushi rice cookers use a CR2032 lithium coin cell battery, though some specific older models might use CR2450 or CR2354 batteries. It’s always best to check your specific model’s existing battery or owner’s manual for confirmation before purchasing a replacement.
How long do Zojirushi rice cooker internal batteries last?
The internal lithium batteries in Zojirushi rice cookers are designed for longevity, typically lasting between 5 to 10 years. Their lifespan depends on usage, environmental factors, and how frequently the unit is unplugged.
Will replacing the battery void my Zojirushi warranty?
Yes, opening your Zojirushi rice cooker to replace the internal battery will almost certainly void any active manufacturer’s warranty. This repair should be undertaken with the understanding that you are doing so at your own risk.
Can I use a battery holder to replace the Zojirushi battery without soldering?
If your original battery is soldered, you’ll still need soldering skills to attach a battery holder to the PCB. However, once the holder is in place, future battery replacements become a solder-free process, making it much easier.
Why is my Zojirushi rice cooker clock blinking “7:00”?
A blinking “7:00” on your Zojirushi rice cooker’s display is a common indicator that the internal battery, which maintains the clock and timer settings, is weak or completely dead. This means it can no longer hold the time when the unit is unplugged.