Have you ever dreamt of savoring rich, creamy homemade yogurt without needing specialized equipment? With a humble rice cooker, this dream can easily become a delicious reality. Often overlooked for its versatility beyond cooking grains, your rice cooker can provide the ideal warm, consistent environment needed to transform simple milk into a probiotic-rich delight. This guide will walk you through everything you need to know, from understanding the science to mastering the step-by-step process, ensuring you can whip up batch after batch of perfect yogurt right in your kitchen.
Understanding Your Rice Cooker’s Role in Yogurt Making
Yogurt making is a fascinating process where beneficial bacteria consume lactose (milk sugars) and convert it into lactic acid. This acid then acts on the milk proteins, causing them to coagulate and thicken, resulting in yogurt’s characteristic texture and tangy flavor. For this fermentation to occur successfully, the bacteria need a consistently warm temperature, typically between 90-110°F (32-43°C), for several hours.
This is where your rice cooker shines. While primarily designed for cooking rice, many models offer functions that create and maintain the precise low heat required for yogurt incubation. Even basic models with a simple “Keep Warm” function or good insulation can be adapted for this purpose, making homemade yogurt accessible to almost anyone. The enclosed environment helps trap heat, mimicking a dedicated yogurt maker and providing a stable temperature for the live active cultures to thrive.
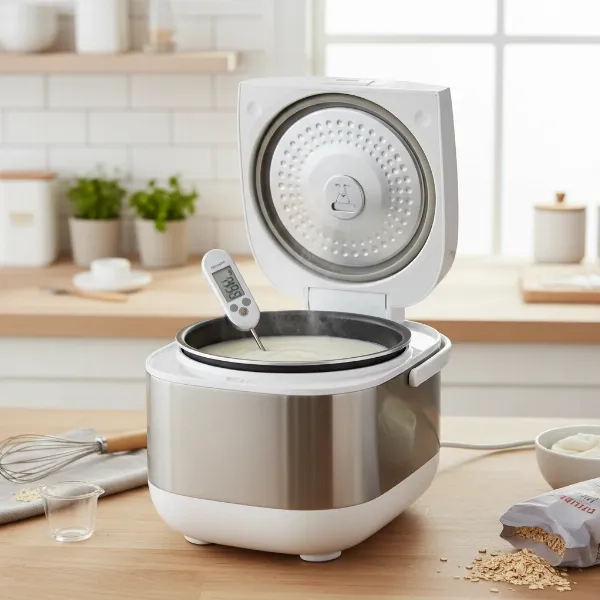 A modern rice cooker with a bowl of milk and a thermometer inside, illustrating the yogurt-making process
Essential Ingredients and Equipment for Homemade Yogurt
Before you begin your yogurt-making journey, gathering the right ingredients and tools is crucial for a smooth and successful process. Starting with quality components ensures a delicious end product and minimizes common pitfalls.
Key Ingredients: Milk and Starter Culture
The two primary ingredients for homemade yogurt are milk and a starter culture, which introduces the beneficial bacteria.
- Milk: For your first few batches, whole, pasteurized cow’s milk is generally recommended as it tends to be more forgiving and yields a richer, thicker yogurt. Low-fat or goat milk can be used but may result in a thinner consistency. You can also add dry, powdered non-fat milk or a can of evaporated milk before the initial heating to significantly enhance thickness.
- Starter Culture: This is the key to fermentation. You have two main options:
- Plain Store-Bought Yogurt: Ensure it contains “live active cultures” and is unflavored. Some brands may not have enough active cultures for consistent results, so choosing a reputable brand known for its live cultures is important.
- Freeze-Dried Yogurt Starter: These are specifically formulated bacterial cultures available online or in specialty stores. Many home yogurt makers find these cultures provide more consistent and robust results.
|
Our Picks for the Best Rice Cooker in 2026
As an Amazon Associate I earn from qualifying purchases.
|
||
| Num | Product | Action |
|---|---|---|
| 1 | AROMA® Select Stainless® Rice Cooker, 3-Cup (Uncooked) / 6-Cup (Cooked), Stainless Steel Inner Pot, Small Rice Cooker, Auto Keep Warm, 1.2 Qt, White, ARC-753SG |

|
| 2 | AROMA® Mini Rice Cooker, 2-Cup (Uncooked) / 4-Cup (Cooked), Grain Cooker, Soup Maker, Oatmeal Cooker, Auto Keep Warm, 1 Qt, Milk Tea color |
|
| 3 | Instant Pot 4QT RIO Mini 7-in-1 Multi-Cooker, Pressure Cooker, Slow cook, Sauté, Steam, Rice Maker, Yogurt, & Warmer, Sea Salt, 4 Quarts |
|
| 4 | COSORI Rice Cooker 10 Cup, 24h Keep Warm, Non-stick Ceramic Inner Pot, 18 Functions Fuzzy Logic Rice Maker with Stainless Steel Steamer Basket, Sauté, Slow Cooker, Black |
|
| 5 | BLACK+DECKER Rice Cooker 6-Cup (Cooked) with Steaming Basket, Removable Non-Stick Bowl, White |
|
| 6 | Aroma Housewares 4-Cups (Cooked) / 1Qt. Rice & Grain Cooker (ARC-302NGBL), Blue |
|
| 7 | COMFEE' Compact Rice Cooker, 6-in-1 Stainless Steel Multi Cooker, Slow Cooker, Steamer, Saute, and Warmer, 2 QT, 8 Cups Cooked(4 Cups Uncooked), Brown Rice, Quinoa and Oatmeal, 6 One-Touch Programs |
|
| 8 | AROMA Digital Rice Cooker, 4-Cup (Uncooked) / 8-Cup (Cooked), Steamer, Grain Cooker, Multicooker, 2 Qt, Stainless Steel Exterior, ARC-914SBD |
|
| 9 | Zojirushi Micom 3-Cup Compact Size, Multiple Settings, Stainless Steel Made, Built-In Retractable Power Cord and Easy to Transport Rice Cooker and Warmer |
|
| 10 | AROMA® Mini Rice Cooker, 2-Cup (Uncooked) / 4-Cup (Cooked), Grain Cooker, Soup Maker, Oatmeal Cooker, Auto Keep Warm, 1 Qt, Light Green |
|
Essential Tools: Beyond the Rice Cooker
While your rice cooker is central, a few other items are indispensable:
- Saucepan: For heating the milk on the stovetop.
- Food Thermometer: Essential for accurately monitoring milk temperatures during heating and cooling. A candy thermometer works well.
- Whisk: For thoroughly mixing the starter culture into the milk.
- Storage Containers: Clean, airtight containers for refrigerating your finished yogurt.
- Optional (for thicker yogurt): Cheesecloth or a fine-mesh strainer if you plan to make Greek yogurt by straining whey.
Step-by-Step Guide: Making Yogurt in a Rice Cooker
Creating homemade yogurt in your rice cooker follows a straightforward process that involves heating, cooling, inoculating, and incubating. Precision in temperature and cleanliness are key to success.
Step 1: Sanitize All Your Equipment
Cleanliness is paramount to prevent unwanted bacteria from interfering with your yogurt culture. Before you start, thoroughly wash and sanitize all equipment that will come into contact with the milk, including your saucepan, whisk, thermometer, the rice cooker’s inner pot, and storage containers. A simple sanitizing solution can be made by filling a sink with water and adding ¼ cup of regular chlorine bleach, then dipping your equipment for one minute and allowing it to air dry. This ensures only the “good” bacteria populate your milk, leading to a pure, delicious yogurt.
Step 2: Heat the Milk to the Right Temperature
Pour your milk into a clean saucepan and insert your food thermometer. Heat the milk over medium heat until it reaches 180-190°F (82-88°C). Stir frequently to prevent scorching. For a thicker yogurt, you can hold the milk at 180°F for about 20 minutes. This scalding process denatures the milk proteins, allowing them to form a firmer curd, and also eliminates any undesirable bacteria that might compete with your starter culture. Ensure the milk does not boil, as this can affect its taste and consistency.
Step 3: Cool the Milk for Optimal Fermentation
Once the milk has reached the target temperature and been held if desired, remove it from the heat and allow it to cool. The ideal temperature for adding your starter culture is between 100-110°F (38-43°C). Allowing the milk to cool naturally can take a few hours, or you can speed up the process by placing the saucepan in an ice bath. It’s critical not to add the starter when the milk is too hot, as high temperatures will kill the beneficial bacteria, preventing fermentation.
Step 4: Introduce Your Starter Culture
When the milk has cooled to the correct temperature, it’s time to “pitch” your starter. Take out about one cup of the warm milk and whisk in your yogurt starter (either a spoonful of plain yogurt with live cultures or your freeze-dried culture). Mix it thoroughly until there are no lumps. Then, pour this starter-milk mixture back into the remaining milk in the saucepan and whisk gently but thoroughly to ensure the cultures are evenly distributed.
Step 5: Incubate in Your Rice Cooker
Transfer the inoculated milk to the inner pot of your rice cooker. Now, it’s time to provide the warmth for fermentation. Depending on your rice cooker model, you have a few options:
- Option 1: Using a “Yogurt” Function: Many modern rice cookers, especially multi-function models, come with a dedicated “Yogurt” setting. If your rice cooker has this, simply close the lid, select the “Yogurt” function, and set the incubation time, typically around 8 hours. The cooker will maintain the perfect temperature automatically.
- Option 2: Using the “Warm” Setting (with monitoring): If your rice cooker only has a “Warm” setting, you’ll need to monitor the temperature. The “Warm” setting often exceeds the ideal 110°F. Some users find success by turning the “Warm” setting on for 30 minutes, then off for 30 minutes, cycling this throughout the incubation period (e.g., 7-8 hours). Alternatively, turn the warm function on for 1 to 1.5 hours, then turn it off and let it sit for 8 hours.
- Option 3: Simple Insulation Method: For basic rice cookers without specific functions, you can rely on their insulation. Place the inner pot with the inoculated milk inside the rice cooker (unplugged), close the lid, and then wrap the entire rice cooker in a thick towel or blanket. This helps to retain the residual heat in the milk for 8-12 hours, allowing fermentation to occur. This method requires no electricity during incubation.
Incubate for 7-12 hours. The longer the incubation, the tangier and often thicker the yogurt will be.
Step 6: Refrigerate to Set
Once the incubation period is complete, you should have a thickened, tangy yogurt. To stop the fermentation process and set the yogurt, transfer it to clean storage containers, cover them, and refrigerate for at least 8 hours. This chilling period allows the yogurt to firm up further and develops its final texture.
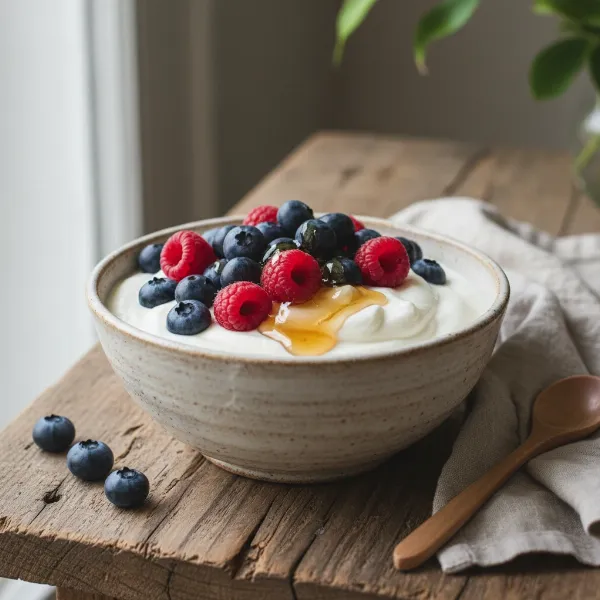 A bowl of freshly made homemade yogurt from a rice cooker, garnished with berries and honey
Elevating Your Homemade Yogurt: Tips and Troubleshooting
Making yogurt at home is a rewarding experience, but a few tips can help you achieve perfection, and knowing how to troubleshoot common issues can save a batch.
Achieving Thicker Yogurt
Many homemade yogurts are naturally thinner than store-bought varieties due to the absence of thickeners like gelatin or pectin. However, you can enhance the thickness:
- Use Higher Fat Milk: Whole milk naturally produces a richer, thicker yogurt.
- Add Milk Powder: Stirring in dry, powdered non-fat milk (about 1/4 cup per liter of milk) before heating the milk can significantly increase its protein content and result in a firmer set.
- Strain the Yogurt (for Greek Yogurt): After refrigeration, pour your homemade yogurt into a cheesecloth-lined colander set over a bowl. Let it sit in the refrigerator for several hours or overnight to allow the whey to drain. The longer it drains, the thicker your Greek yogurt will become. The strained whey can be used in smoothies or baking.
- Longer Incubation: A slightly longer incubation time can also contribute to a thicker consistency and a tangier flavor.
Common Issues and How to Fix Them
Even experienced yogurt makers encounter occasional hiccups. Here are some common problems and their solutions:
- Yogurt is Too Thin/Runny: This is the most frequent issue. Ensure your milk temperature was correct during both heating and cooling. The starter culture might also be old or inactive; try a fresh starter. Adding milk powder (as above) can also help.
- Yogurt is Lumpy or Grainy: This often happens if the milk was heated too quickly or unevenly, causing proteins to curdle. It can also occur if the starter wasn’t thoroughly mixed or if the incubation temperature fluctuated too much.
- No Fermentation/Milk is Still Milk: The most likely culprit is that the milk was too hot when the starter was added, killing the bacteria. Always double-check your thermometer. Alternatively, your starter culture might be inactive or expired.
- Unpleasant Taste/Smell: This usually indicates contamination from other bacteria. Ensure all equipment is meticulously sanitized.
Flavoring and Storage
Once your yogurt is set, the possibilities for customization are endless. You can add sweeteners like honey, maple syrup, or sugar. Fresh or frozen fruits, vanilla extract, cinnamon, or even savory spices can transform your plain yogurt. Always add flavorings after the yogurt has incubated and chilled to prevent them from interfering with the fermentation process.
Store homemade yogurt in airtight containers in the refrigerator for up to 5-7 days. Saving a cup of plain, unflavored yogurt from your fresh batch can serve as the starter for your next one, perpetuating your delicious homemade supply!
Benefits of Making Yogurt at Home
Beyond the satisfying taste, crafting your own yogurt offers a myriad of advantages that benefit both your health and your wallet.
Firstly, homemade yogurt provides unparalleled control over ingredients. You can avoid the added sugars, artificial flavors, preservatives, and thickeners often found in commercial yogurts. This means a cleaner, healthier product tailored to your dietary needs and preferences. For instance, if you’re watching sugar intake, you can sweeten your yogurt minimally or opt for natural alternatives.
Secondly, it’s a cost-effective solution. Milk is generally much cheaper than purchasing pre-made yogurt, especially if you consume it frequently or have a large family. Over time, the savings can be substantial, making this a smart financial choice for conscious consumers.
Moreover, homemade yogurt boasts a thriving population of live active cultures, often exceeding those found in some store-bought varieties. These probiotics are vital for gut health, aiding digestion, boosting immunity, and potentially contributing to overall well-being. Knowing exactly what goes into your yogurt gives you confidence in its probiotic benefits.
Finally, there’s an immense sense of accomplishment and culinary joy in creating something delicious from scratch. The simple act of transforming milk into a wholesome, versatile food can be a deeply satisfying experience, encouraging further exploration in your kitchen.
“Making yogurt at home isn’t just about saving money; it’s about connecting with your food and ensuring you’re nourishing your body with the purest ingredients.” – Lan, Admin of ricecookerhot.com
Conclusion
Making yogurt in a rice cooker is a surprisingly simple and rewarding culinary adventure that empowers you to create fresh, wholesome, and customizable dairy goodness right in your own kitchen. By understanding the key steps of heating milk, introducing an active starter, and maintaining a consistent incubation temperature, your rice cooker can effortlessly serve as your personal yogurt maker. The result is a creamy, tangy treat that’s not only delicious but also packed with beneficial probiotics, offering a healthier and more economical alternative to store-bought options. So, why not give it a try and discover the satisfaction of homemade yogurt today? What delightful flavors will you create in your very first batch?
Frequently Asked Questions
Can I use non-dairy milk to make yogurt in a rice cooker?
Yes, you can experiment with non-dairy milks like soy, almond, or coconut milk, but the results may vary in consistency and fermentation time. Non-dairy milks often require specific vegan starter cultures and may produce a thinner yogurt compared to dairy milk due to differences in protein and fat content.
How do I know if my homemade yogurt is safe to eat?
Properly made homemade yogurt should have a pleasant, tangy aroma and taste, and a consistent, thickened texture. If your yogurt smells off, has mold, or an unusual color, it’s best to discard it. Always prioritize sanitizing equipment and ensuring correct temperatures to prevent harmful bacteria growth.
What kind of rice cooker is best for making yogurt?
While any rice cooker can be adapted using the insulation method, models with a dedicated “Yogurt” function are ideal as they precisely control temperature. Rice cookers with a reliable “Keep Warm” setting can also work, but may require manual monitoring to maintain the optimal fermentation temperature.
Can I reuse my homemade yogurt as a starter for the next batch?
Absolutely! This is a common and economical practice. Simply reserve about 1/4 to 1/2 cup of your plain, unflavored homemade yogurt from a fresh batch to use as the starter for your next one. Ensure you use it within 5-7 days for the best results, as the cultures can weaken over time.
Why do I need to heat the milk to such a high temperature?
Heating the milk to 180-190°F (82-88°C) serves two main purposes: it denatures the milk proteins, which helps create a thicker, firmer yogurt, and it kills any undesirable bacteria that could compete with your yogurt starter, ensuring a clean and successful fermentation.